Showing posts with label organic gardening. Show all posts

Friday, July 17, 2015

Okra, Okra, and more Okra

It's that time of year when the okra is coming in strong and I find myself saying, "What am I going to do with all this okra?"  I'm sorry, but I just can't stomach pickled okra.  I like my okra one way and one way only: fried!  

Unfortunately, once okra has been frozen or canned, it just turns into a slimy mess--not anything that can be fried up and turn out decent. So here's something I'm trying new this year; let's hope it works.

Ready-to-Fry Frozen Okra

Step 1: Wash okra and cut into pieces.

Step 2: Coat pieces in cornmeal.  (And for those who don't know, true Southern frying is done with a light cornmeal-dusting batter, none of that thick, heavy carnival-like stuff.)


Step 3: Arrange the coated okra in a single layer on a cookie sheet.


Step 4: Bake at 350 degrees for 20 minutes.

Step 5: Allow the okra to cool and then place it in quart freezer bags.


Thursday, July 9, 2015

Pea Shelling and a Bad Homestead Day


The title may be a bit misleading because these are not actually events of the same day, but I'm cramming them into one post.

On Sunday, we picked several gallons of purple hull peas. Since the boys had a dentist appointment early Monday (we LOVE Alabama Pediatric Dental Associates by the way...post for another day), I decided I would just swing by the Farmers' Market and pay the small fee to have them shelled.

Long story short, the shelling machine was down, so I put the farmhands to work that evening (ie, the slave labor I call my children).


They're thrilled on the inside I'm sure!  Being boys, they turned it into a major competition.  They spent most of the hour adding new rules and a whole point system and then trying to steal each other's beans.  It really was a fun evening.  And we ended up with about 18 cups of now-frozen peas for the winter.

So fast-forward to today.  I got out to the garden early to pick green beans with plans to can up some quarts in the evening.  I picked a two-gallon bucketful (about half the beans), and then got called into the house to referee a quickly-escalating WWE match.  Another long story short: I got distracted (details following momentarily), determined to pick the rest of the beans in the afternoon, left the house for the day, and never thought about the already-picked beans again.  Well, that is until Brandon came home and discovered I had left them outside and they had shriveled up and ruined.  I despise hardwork for the sake of hardwork (ie, for nothing!). Thus, Part 1 of Bad Homestead Day.

Part 2? you ask.  Well that was the distraction that caused Part 1 to occur.  I went to get a bucket from the barn and noticed the barn gate was swinging wide open.  I wasn't too concerned initially; we leave it open often during the day to encourage the chickens to free range.  But when I went in, I saw a pile of feathers and feared for the worst.  After a quick chicken count, I discovered FIVE chickens were missing (one later showed up for an actual loss of four chickens, but still...not good.)

Not much later, as I was getting ready to get us all out the door, the boys ran to me in a frenzy because a chicken leg had been discovered on the back patio.  The discussions this leg caused were quite comical and the story of the poor slaughtered chicken continued getting more and more dramatic.  By the end, Mason had "heard" screeching and "seen" blood every where.  Ewww!  Boys and their imaginations!

All-in-all, a bad homesteading day, but at least I got some good blog material.

Tuesday, November 11, 2014

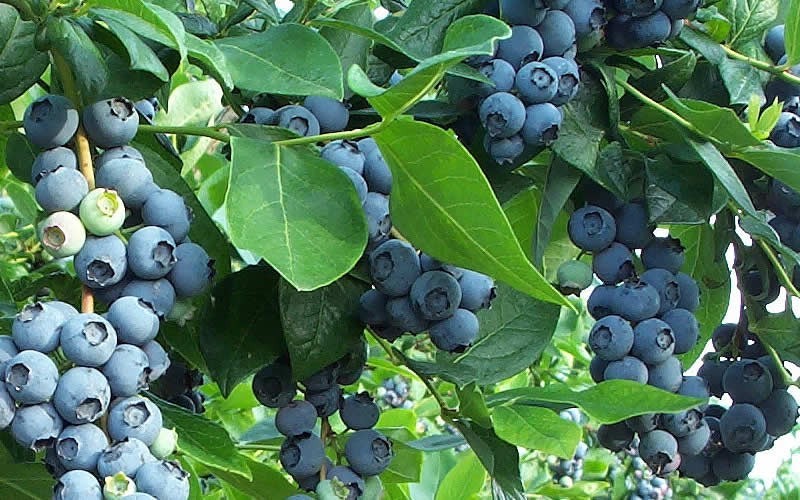
Blueberries

It seems strange to be thinking about gardening this time of year, but I don't want you to miss an important gardening season: blueberry planting!  Late fall is the perfect time to plant blueberry bushes.  Here's what you need to do:
1. Select a variety.  Typically, the variety sold at your local garden center is the variety that will perform best in your area.  Blueberries come in highbush (~8ft. tall) and lowbush (<2ft. tall) varieties.  (In the South, we like the Rabbit-eye blueberry.)

2. Select a planting site.  Whether you go with a highbush or lowbush will obviously affect your location.  Either way, some key points to keep in mind are plenty of moisture, good air circulation, and FULL SUN.  (I made the mistake of planting several in morning sun only...the berries just won't produce.)

3. Water, water, water.  Yes, even in these cold months, your new blueberry bushes need plenty of water.  Trust me, it will be worth your efforts come harvest time.


Wednesday, July 2, 2014

How to Can Green Beans

If you have never canned before, this is a great first-time canning project.  It's quick, easy, and delicious.  I have to say a special "thank you" to my friend Janice for the hands-on lesson.  Canning is always more fun when you are doing it with a friend.  Canning rookies should read this post before continuing on.

Here's what you'll need:
Green beans
Pickling/canning salt
Pressure canner
Jars (pint or quart)
Lids and bands

If you are picking beans from the garden, pick them when the pods are just getting bumpy.  They should be firm and not hollow-feeling between the beans.

Instructions
Wash the beans and remove the ends.  Green beans may be canned whole or in pieces.  If you want pieces, snap or cut beans into 1 1/2" long pieces (about 2-3 pieces per pod).  Discard any tough, hollow, or bug-bitten pieces.

Snap beans by bending downward so that the "seam" faces up.


Prepare jars, lids, and bands according to your preferred method.  Jars must be hot.

Using a canning funnel, fill jars with beans, leaving a 1" headspace.  Add canning salt on top of beans (1/2 tsp per pint; 1 tsp per quart).


Pour hot water into jars, covering beans.  The water should just be hot water from the tap.  Remove the air bubbles that may have formed.


Wipe the rims of the jars clean and place the lids onto the jars.  Twist on the bands to "fingertip tightness."  Do not over-tighten or the lids may not seal.

Follow the instructions for your pressure canner.  I use 1 quart of water (about 1" deep) for seven quart jars.  For green beans, can at 10 pounds of pressure, 20 minutes for pints and 25 minutes for quarts.  Make sure all of the pressure has been released from the canner before removing jars (the inert vent will be down).


Set jars on a dry towel with some space between the jars, and cover them with another towel to keep the temperature from dropping too quickly.


After the jars have cooled, make sure they all sealed.  If a lid doesn't seal, put that jar in the refrigerator and eat within a couple of days.  Otherwise, you can enjoy your beans right away, or store them for winter.  Let me know if you give it a try by commenting below.  Good luck!


Thursday, June 26, 2014

Canning Basics

It's that time of year when the garden is overflowing, and I'm left with a counter full of veggies and asking, "What am I supposed to do with all of this stuff?"  (Every year, I promise myself I won't plant this much again, but every year, I get caught up in the excitement of planting and go overboard.)

So now begins the season of preserving.  There are several options for preserving homegrown produce: freezing, canning, curing, keeping, etc.

Over the next few weeks, I am going to provide some super easy preserving recipes.  But before we get into that, here are some canning basics.

There are two types of canners: pressure and water bath.  There are some important differences between the two.

Pressure canner (left) and water bath canner (right)
Pressure Canner

  • A pressure canner is not the same thing as a pressure cooker.
  • Low acid foods MUST be preserved in a pressure canner.  This includes pretty much all vegetables unless they are going to be pickled, as well as animal products. (Yes, you can can chicken!)

Water Bath Canner

  • High acid foods may be preserved in a water bath canner.  This includes fruits, tomatoes, and pickled vegetables.
  • Water bath canners do not work great on smooth top ranges.  It may take as much as an hour for the water to boil.

With both canners, there must be a rack inside the canner to keep the jars off the bottom.

Whether using a pressure or water bath canner, having the right tools makes the process much easier.  I recommend Ball's Utensil Set for Preserving, which includes a funnel and can grabber (both essential), as well as a headspace tool and magnet.  This kit costs less than $10.


Ball brand Utensil Set for Preserving

Along with the canner, you will also need jars specifically made for canning, lids, and bands.  Jars come in quart, pint, and half-pint sizes.  Jars also come with regular and wide-mouth openings.  Be sure your lids and bands match the jar opening size.  Jars and bands may be reused, but lids can be used only one time.

Ball brand mason jar, lid, and band

Before canning, jars, lids, and bands must be sterilized.  You can do this by either washing them in hot, soapy water and then boiling them for about 10 minutes, or you can run them through the dishwasher.  I use the dishwasher method (remember, I'm lazy).

It's important to know that a quick temperature change can cause jars to crack.  So if you are adding hot contents to the jars (you usually are), then the jars need to be hot as well.  I get mine straight from the dishwasher while they're still hot and add the contents immediately.  If you're unable to do this or are canning a large amount, you can put the jars in the oven on 250 degrees to keep them warm until ready for use.

Always check your recipe for the length of time the jars should remain in the canner.  It depends on size, food type, and altitude.  The last multi-purpose item you will need is canning salt.

Ball brand canning salt

Supply List Recap
Canner (pressure or water bath)
Utensil set
Jars
Lids
Bands
Canning Salt

Now that you know the basics and have gathered your supplies, you're all set for my upcoming recipes!

Monday, June 2, 2014

Organic Gardening Products I Love

I'm not going to sugar coat it...organic gardening is tough!  I look at the neighbor's garden and see deep green plants that are twice the size of mine bearing fruit in half the time, and I groan inside.  Sometimes I get so discouraged that I want to jump in my car, head to the garden center, and purchase every chemical they sell.  But I stick to my guns and sweat it out (literally).

Along the way, however, I have found a few organic products that are helpful, so I want to share them with you.  Please comment below to add your favorites to this list as well.

1. You can't beat chicken litter for a natural fertilizer, but if you don't have ready access, try Miracle-Gro's Organic Choice Organic Plant Food.  Be prepared for a little odor, and if you have a dog, he/she will try to gobble it up about as fast as you can sprinkle it on.  But I have seen my plants "take off" after using this product.


2. For insect control in small areas, try using an insecticidal soap.  You can easily make your own by mixing 1 tablespoon of pure liquid soap such as Dr. Bronner's (found at Target and Publix), 1/2 tablespoon of cooking oil (vegetable, canola, olive, sunflower, etc.), and 1 quart of water.  Mix it in a spray bottle and apply generously to plants.


3. For a large garden or persistent pests, try neem oil.  It can be purchased already diluted in a spray bottle or in concentrate form, which you will mix with water in a sprayer.  I have had luck with this Garden Safe brand.


Unfortunately, when it comes to insect control, nothing is going to kill 'em dead like the hardcore chemicals.  But that fact alone should be enough to make you think twice about ingesting that stuff yourself.  Putting in a little extra time and effort to remain organic is totally worth it in the end.  Use whatever organic products you can find, and happily accept that nature is probably going to get a portion of your bounty!

Friday, May 30, 2014

Simply Herbs: Getting the Garden that’s Right for You

A person could go crazy trying to figure out which herbs to put in her herb garden…which ones prefer sun or shade…which ones prefer dry or moist soil…which ones grow in which zones…It’s overwhelming!  So, as with everything else I do, I keep it simple...really simple.

To help you keep it simple as well, here are some suggestions for designing and planting the herb garden that’s right for you.  And yes, you can do it; and yes, it really is simple; and yes, it is extremely enjoyable.


      1. Choose herbs that you like.  Sounds easy enough, but many people don’t take the time to think about what herbs they actually like.  Don’t be tempted to purchase whatever happens to be on the shelf at the Big Box Garden Center.  Ask yourself: What herbs do I use in my cooking?  What herbs do I like to smell?  What herbs do I find attractive?

       To start with, only choose about FOUR herbs (maybe three for cooking and one for fragrance).  You can add more later, but there is no need to get overwhelmed when you're just starting out.

      2. Choose herbs that you can easily grow.  Do a little research (key word: little) just to make sure the herbs you like can be grown in your zone.  (If they are sold at your local garden center, then chances are they will grow in your zone.)  I suggest starting with perennial herbs; again, that’s because I like to keep it simple and don’t want to replant every year.

      3. Choose a location.  I always recommend incorporating utilitarian plants into the permanent decorative landscaping, and the same is true for herbs.  However, you may be happier having herbs all together in one designated garden.  If you are interested in using your herbs for culinary purposes, choose a location close to the kitchen.  Personally, I had zero luck growing herbs in an indoor container, so I wouldn't recommend that if you're trying to keep it simple.  Also, most herbs prefer full sun, with only some tolerating shade.  Just make a note of that during your research.

4. Plan your garden.  Once you have decided on about four herbs you would like to grow, think about the placement of each herb based on its size.  Put taller herbs toward the back so that they don’t hide the smaller, low-growing plants.


5. Acquire and plant.  Acquire your herbs in one of two ways: transplant a friend’s herbs or purchase plants from a garden center (this second option is probably best for a new gardener).  Plant herbs according to the instructions, add some compost to the soil, mulch (I use pine straw), organic fertilize, and water.  Keep the herbs well watered (every day or two in the beginning), and enjoy!

Thursday, May 29, 2014

Composting: Just the Basics, Please

Why should you compost?  Because you can reduce landfill waste...save money...know what you're putting in your soil...grow better plants...and most importantly, have a lot of fun!

When I first started composting, I kept reading that I couldn't really mess it up...well, actually, yeah, I can!  It took me about three years to get it figured out and have usable compost.  So let me save you some trouble and give you the basics to getting it right the first time.

The Bin

First, get a compost bin.  Buy one, make one, whatever...just get one.  A bin doesn't aid in the composting process, but it makes the compost seem more manageable...organized...and neater looking.  I recommend building your own two-compartment bin with one side being twice the size of the other.


The smaller side of the bin will be devoted to waste.  Just let it pile up; no turning necessary.

"Waste Side"

The larger side of the bin will be devoted to compost.  Once the waste side gets full (or you get eager to compost), move the waste to one side of the compost side.  Turn the compost over about every 2-3 days, flipping from one side to the other of the compost side of the bin.  I recommend investing in a quality, American-made pitch fork.  It will be well worth the investment.

"Compost Side" (Turn compost from one side to the other every 2-3 days.)

The bin should not have a bottom; your compost needs to be in contact with the ground.  Depending on your situation, you may have to enclose your bin to keep critters out.  (When we got the new puppy, I had to use some hardware cloth and garden fencing to make a temporary front.)  Just make sure air can still flow through the bin.

The Logistics

Location: You will want your bin close enough to the kitchen for convenience, but far enough away to avoid odor or pests.  Mine is about 20 feet from the back door, which is perfect for my situation.

Collection: You have two options for collecting kitchen waste--a bowl/sack on the counter that is taken to the bin after each meal or a container with a lid that is taken to the bin every other day or so. Please DO NOT waste money on purchasing a container with a charcoal filter because it is simply unnecessary and, in my opinion, doesn't provide any of the advertised benefits.  I use a large butter tub with a lid and take out my waste every other day.

Duration: The time it takes for the waste to turn to compost depends on a lot of factors, one of which is the size of the waste materials.  For example, apples take a lot longer to compost than grapes.  Just keep turning, and eventually, it will all turn into "black gold."  Sometimes, my compost still has large pieces that I will just leave in the bin when I take out my compost for use.

What to Compost

The hardest part of composting is getting the right carbon/nitrogen ratio (about 50/50).

Carbon materials (think brown) include dried leaves, paper, cardboard, straw, sawdust, dried grass, dryer lint.

Nitrogen materials (think green) include grass cuttings, green leaves, fruit/vegetable trimmings, weeds, old flowers, coffee grounds.

You want about half of each type of material.  So if you dump in a whole bunch of grass cuttings, you'll need to lay off adding other nitrogens and add a whole bunch of carbons instead.  As you get familiar with your compost, you will more easily be able to see what it needs, so don't let the 50/50 ratio stress you out.  Remember, composting is fun!

Materials to Avoid: chemically-treated materials, meat, dairy products, fat/grease, carnivore manure (cat, dog, human--yuck!), non-biodegradable items such as plastic.

Happy Composting!  And as always, post your comments below to let me know how it goes.

Wednesday, May 28, 2014

Something about Strawberries


There's just something about strawberries that signals the start of summer, and growing my own organic strawberries is one of my greatest joys.  I could spend this entire post describing the pride I feel after harvesting a meal's worth of perfect berries or the pleasure I get when the boys pick some berries and toss them in their mouths for a snack just because they were walking by and saw the berries yearning to be picked.  But instead, I'm going to give you some sound advice for growing your OWN organic strawberries so you can experience the joy for yourself!

1. First off, there are different types of strawberries, so choose wisely.  I started with two strawberry plants picked up on a whim at Lowe's.  For two years, I wondered why my berries were so tiny and my mom's were so hefty.  Alas, mom informed me that I had simply purchased a type of strawberry different from her grocery store-worthy fruit.


So I got several plants from her, and was soon reassured that the tiny berries were not an indication of my gardening skills.  This is a good time to note that strawberry plants produce "daughter" plants that have to be pulled up and transplanted.  Ask around and find someone willing to give you his/her daughter plants for FREE (or at least in exchange for digging them up yourself)!  A family of four will be provided with some snacks and side dishes for about 6 weeks with about 10 plants.  That's a good number to start with if you're a beginning gardener.  Later if you want to make jam and have berries to share, go ahead and plant a huge patch!

2. After selecting the type of strawberry you want, select a good spot for planting.  I have had the best luck with full sun, even in the heat of Alabama.  Consider using strawberries as part of your decorative landscaping.  They are beautiful plants that stay green year-around.


3. When I plant practically anything, including strawberries, I add compost to my soil, top with mulch (for strawberries, use pine straw), add a little organic fertilizer, and water well.

4. As with all perennials, the first year is the hardest.  Keep those babies watered and free of pests.  The biggest pest problem I have had is SLUGS.  I tried insecticidal soap...Nope!  I tried copper barriers...Nope!  I tried crushed egg shells...Nope!  I tried used coffee grounds...Maybe!  I have had less slug trouble this year, but is it because of the coffee grounds?  I'm not really sure.  But it's worth a try for you (if you drink coffee and have grounds readily available.)  Just sprinkle the grounds all around the plants.  Reapply as often as you have grounds available.  However, as with all organic gardening, be willing to share a little.

5. A final note: I stick small "tomato" cages in my strawberry plants to keep the dog from trampling through them.  If birds become a problem, you will have to throw some aviary netting over your plants as well.

Post your comments below to let me know how it goes!