Wednesday, December 17, 2014

Country Christmas: The (not so) Perfect Tree

As we have done in the past, we once again decided to go "au naturel" when it came to our Christmas tree.  This year, we headed to MeMaw and PawPaw's farm to find our perfect tree.

We loaded up in the Gator, and set out on the hunt.


We found several great trees, but ultimately settled on this beauty.


Mason was thrilled to use the real saw PawPaw had given him for his birthday this summer.  (I, on the other hand, was not quite as excited about the prospect of someone losing a finger!)


After cutting and loading the tree on the Gator, the real fun began...

As we neared the house, the tree suddenly leapt off the Gator and landed with a thud about 20 feet behind us (still not sure how that happened).  Mason immediately dismounted as well and began screaming at and beating the tree with a stick, while Brady looked on and sang "O Christmas Tree" at the top of his lungs.  There are no pictures because I was laughing too hard at the insanity.

But eventually, we had the tree loaded and were headed home.


Once we got the tree home, we realized just how ugly it really is.  The trunk is only about 1 inch in diameter, so the tree stand isn't really capable of even holding it up; therefore, it kept falling over.  Again, no pictures because there were no free hands available as we tried to stabilize and ever-so-delicately decorate the tree.  But here's the finished product:


Just how pitiful is this Charlie Brown tree?  Even the paper ornaments cause the "branches" to bend!


Yes, it's an ugly tree.  Yes, I still keep wistfully eyeing that tree in Southern Living magazine.  But yes, it was one of the best days ever...family, laughter, the outdoors...the true Christmas spirit and a memory I will cherish forever.

Saturday, November 29, 2014

This Little Piggy: Five Reasons to Raise Porkers

If you are thinking about raising your own meat, but aren't sure where to start, let me suggest a pig...well actually two pigs.  Most people I know who want to try their hand at raising meat start with either goats or chickens...probably because they are small.  But personally, I don't eat goat meat, and chickens are...well...let's just say, it's complicated (and that's a post for another day).  So if you eat pork, start with pigs.  Here's why:

1. You can't really mess up pig feeding.  Pigs eat just about anything.  However particular you are with your food determines how particular you will be with your pigs' food.  Since we try to eat clean and organic, the scraps our pigs get are also clean and organic.  We supplement scraps with high quality feed: we use Calf Manna (good stuff!) and corn.  We also feed our pigs lots of eggs since we have those in plenty around here.

Young pigs eating scraps.

2. Housing for two pigs is super easy as well.  All you need for two pigs is a small pasture (really just a paddock) and a 3-sided shelter.  Some may argue you don't even need a shelter, but I feel better knowing my animals have shade in the summer and shelter from the harsh elements in winter.

3. Birth to slaughter is extremely short for a pig.  Pigs farrow twice a year, so a spring litter is ready for slaughter in the fall, and a fall litter is ready for slaughter in the spring.  (Poor momma, right?)  The fast turn-around is great because the return on your investment is quick, and if you decide meat-raising is not for you, you're not stuck for long.  About the time I'm fed up with the pigs, it's time for them to go to slaughter anyway!

4. Speaking of slaughter, that's another benefit.  Slaughterhouses process pork.  For several reasons, I prefer letting someone else "do the dirty work."  One of those reasons is that you need to know what you're doing to correctly process an animal, and I don't.

7-month old Tamworth pig ready for slaughter.

5. Finally, it's hard to fall in love with a pig.  I know Hollywood would have you believe otherwise, but pigs are NOT cutesy, adorable pets...at least not the type of pig you'll be eating.  Not only are they nasty, pigs are mean and aggressive!  I am terrified of pigs!  Yes, the babies are cute, but that only lasts a couple of months.  After that, they would just as quickly bowl you over and bite your leg in two for some feed as look at you!  The pigs are the one barnyard animal we don't let the boys pet or play with.

If you're not already convinced that pigs are the way to go, just think about those juicy pork chops and sausage biscuits you could be eating.  Beef is alright, but pork is where it's at!  Sure there's more to it than what's mentioned above, but pigs really are super easy and great for a beginning homesteader!

Tuesday, November 11, 2014

Blueberries

It seems strange to be thinking about gardening this time of year, but I don't want you to miss an important gardening season: blueberry planting!  Late fall is the perfect time to plant blueberry bushes.  Here's what you need to do:
1. Select a variety.  Typically, the variety sold at your local garden center is the variety that will perform best in your area.  Blueberries come in highbush (~8ft. tall) and lowbush (<2ft. tall) varieties.  (In the South, we like the Rabbit-eye blueberry.)

2. Select a planting site.  Whether you go with a highbush or lowbush will obviously affect your location.  Either way, some key points to keep in mind are plenty of moisture, good air circulation, and FULL SUN.  (I made the mistake of planting several in morning sun only...the berries just won't produce.)

3. Water, water, water.  Yes, even in these cold months, your new blueberry bushes need plenty of water.  Trust me, it will be worth your efforts come harvest time.


Monday, July 14, 2014

Monday Meals: PawPaw's Pancakes

Pancakes are probably not what you expect to find on a blog that usually promotes clean eating, but they're a staple at our house, and I have a few tips to make them healthier.

First, here's the recipe...but keep reading for some additional tips.

What you'll need
1 1/2 Cups all-purpose flour (I love King Arthur organic flour)
1 Tablespoon sugar
3 1/2 teaspoons baking powder
1 teaspoon sea salt
3 Tablespoons melted butter
1 egg (the fresher, the better!)
1 1/4 Cups whole milk

*As always, use local, natural, organic, fair trade products whenever possible.

What you'll do
1. Preheat griddle/skillet to 350 degrees (medium-high heat on stove).
2. Mix together dry ingredients (flour, sugar, baking powder, and salt).
3. Stir in butter, egg, and milk.  Use more or less milk depending on how thick you like your pancakes.  If you like them super thick, turn the temperature down a tad on your griddle/stove to give them more time to cook throughout.
4. Pour batter onto griddle/skillet.
5. Flip pancakes when bubbles begin popping and edges are solidified.

Tips and Tricks
1. So why ditch the Bisquick?  Because... 1) it's full of trans-fat, 2) these pancakes are SO much tastier, and 3) they only take an extra two minutes to make.

2. Add blueberries to the batter make them even tastier and healthier.  Blueberries are a super fruit, recommended for their high antioxidant content (so long free radicals!)

Fresh organic blueberries add flavor to these old-fashioned pancakes.


3. Top pancakes (and waffles) with pure maple syrup.  We LOVE Maple Gold brand.  If you can buy local syrup, please do.  When it comes to syrup, we opt for non-organic, but if you have an abundance of cash, go for it.  Here's a great article on organic versus non-organic syrup: Organic Maple Syrup

Our topping of choice is Maple Gold Pure Maple Syrup.

4. Decorate pancakes with fruit.  This is the best way I have found to get my boys to eat fruit with their breakfast.  Whatever they use to decorate, they have to eat.  (Sometimes I am still amazed that this trick works!)

Silly face pancakes with strawberries and blueberries.

5. Freeze the leftovers!  I always make extra pancakes and stick them in freezer-safe zipper bags. The boys will eat pancakes two or three more times for breakfast during the week.  On super-busy mornings, they can even grab and microwave them all by themselves!  This is a major time-saver during the week and healthier than store-bought frozen pancakes.

6. Use a stainless steel or aluminum electric griddle.  You can make a lot of pancakes in a short amount of time.  Avoid Teflon because it's just not safe.

Enjoy!

Monday, July 7, 2014

Monday Meals: Parmesean Oregano Tilapia


This is one heavenly meal...not only does it taste delicious, but it is also a cinch to whip up.  I really hope you'll give it a try.

Here's what you'll need...
5 Tilapia fillets (fresh or frozen*)
1/3 cup shredded Parmesean cheese
1/2 cup Panko (or other breadcrumbs)
2 teaspoons dried Oregano
1/2 Tablespoon of butter (or non-stick spray)

*Thaw frozen Tilapia by placing it in the refrigerator during the day or by running it under room-temperature water.

Here's what you'll do...
1. Preheat oven to 425 degrees.
2. Rub butter onto (or spray) bottom of 9x13 glass baking dish.
3. In another shallow dish, mix together cheese, Panko, and Oregano.


4. Lightly coat the non-flat side of each fillet by pressing it into mixture.
5. Place each fillet into the dish, slightly overlapping edges if necessary.
6. Bake for 15 minutes.  (Broil for 2 additional minutes if you want a lightly browned crust.)


7. Tilapia is ready when it flakes apart.  Note: the crust will not be very brown at all.

One of our favorite side dishes for any fish entree is a sweet potato.  If you're going to be away all day, you can wrap them in foil and cook them in the crockpot on warm.  If you have some time, go ahead and bake them on 425 for about 2 hours.  (The organic sweet potatoes at Publix have been tiny lately, so they cook in an hour...I actually like the tiny ones better!)  We eat sweet potatoes plain...they're so tasty, they really don't need butter or cinnamon-sugar.

Choose a green veggie for your second side.  Right now, the garden is overflowing with green beans, so that's what we had.  We often have broccoli or asparagus with fish as well.


If you give this Monday Meal a try, let me know how you like it.  Enjoy!


Wednesday, July 2, 2014

How to Can Green Beans

If you have never canned before, this is a great first-time canning project.  It's quick, easy, and delicious.  I have to say a special "thank you" to my friend Janice for the hands-on lesson.  Canning is always more fun when you are doing it with a friend.  Canning rookies should read this post before continuing on.

Here's what you'll need:
Green beans
Pickling/canning salt
Pressure canner
Jars (pint or quart)
Lids and bands

If you are picking beans from the garden, pick them when the pods are just getting bumpy.  They should be firm and not hollow-feeling between the beans.

Instructions
Wash the beans and remove the ends.  Green beans may be canned whole or in pieces.  If you want pieces, snap or cut beans into 1 1/2" long pieces (about 2-3 pieces per pod).  Discard any tough, hollow, or bug-bitten pieces.

Snap beans by bending downward so that the "seam" faces up.


Prepare jars, lids, and bands according to your preferred method.  Jars must be hot.

Using a canning funnel, fill jars with beans, leaving a 1" headspace.  Add canning salt on top of beans (1/2 tsp per pint; 1 tsp per quart).


Pour hot water into jars, covering beans.  The water should just be hot water from the tap.  Remove the air bubbles that may have formed.


Wipe the rims of the jars clean and place the lids onto the jars.  Twist on the bands to "fingertip tightness."  Do not over-tighten or the lids may not seal.

Follow the instructions for your pressure canner.  I use 1 quart of water (about 1" deep) for seven quart jars.  For green beans, can at 10 pounds of pressure, 20 minutes for pints and 25 minutes for quarts.  Make sure all of the pressure has been released from the canner before removing jars (the inert vent will be down).


Set jars on a dry towel with some space between the jars, and cover them with another towel to keep the temperature from dropping too quickly.


After the jars have cooled, make sure they all sealed.  If a lid doesn't seal, put that jar in the refrigerator and eat within a couple of days.  Otherwise, you can enjoy your beans right away, or store them for winter.  Let me know if you give it a try by commenting below.  Good luck!


Friday, June 27, 2014

Confessions of a Farm Girl

This is entirely different from any post I have written before, but I need to get real with you all...I have some confessions...

Several weeks ago, my dear friend Janice brought some of her friends out to our homestead.  I immediately fell in love with Rebecca...kindred spirits for sure!  At one point, Rebecca commented, "Y'all are living the dream!"  What I wanted to say back (and maybe I did) was, "The dream is so much better than the reality."  Homesteading is hard work...plain and simple!  Do I love it?  Yes.  Every day? No.

So that's my first confession...some days, I do not enjoy this lifestyle choice one single bit!  Here's the reality of it and a few more confessions...

Time
Every morning and every night, animals must be fed and watered.  There are routine tasks like worming and hoof trimming.  The barn, chicken coop, and pens constantly have to be cleaned.  There is always (and I mean ALWAYS) something to be fixed or worked on.  Our farm work truly never ends.

Last week, I had to leave a really fun pool party with dear friends right in the middle of laughter and good conversation.  It was hot, and I started worrying about the animals running out of water.  I hated to leave, but I had no choice.

Today, instead of taking the boys to the community pool, I mowed grass for 3 hours (with plenty left undone).  Then, I cleaned out the goat barn.  It was hot, sweaty, and exhausting.  Tomorrow, I will still have to clean out the chicken coop and pig pen...but only after a trip to the feed store.

Money
Speaking of the feed store, most people probably don't realize the cost involved in growing and preserving food and raising animals.  I am constantly going to the feed or home improvement store to get feed, fencing, gates, tools, supplies, etc.  Not to mention the big costs like farm equipment and livestock.

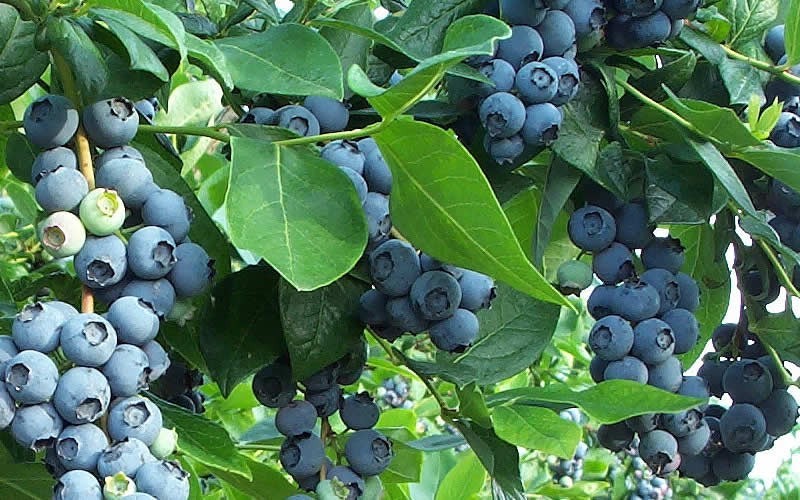
Think about the price of a pound of beef.  In May, we bought about 5,000 pounds worth of cattle!  That's a lot more than pocket change for us!  It seems like every spare penny (and there aren't many to begin with) go into the farm.

Brandon and I had many conversations about the financial sacrifices we would have to make to start our farm.  In the middle of winter, giving up our annual summer beach trip and a trip to Disney World seemed easy enough.  But now that summer is here and our friends are traveling, it's been tougher to give up those vacations than we thought.

Emotions
Making financial sacrifices is just one part of the emotional toll homesteading takes on me.  We have seen our share of loss, from animals to produce.  The animals have injuries, and we wait anxiously to see if they will heal.  We work hard at something, only to have it undone by a storm or a drought.  There are more questions and concerns than I could ever list here.

A few evenings ago, we were drained...physically, financially, and emotionally...and for the first time, we deeply considered selling the whole thing (lock, stock, and barrel as they say) and moving to a postage stamp lot in a neighborhood with a swimming pool!

We always try to make decisions based on three things: 1) pleasing the Lord, 2) the welfare of our boys, and 3) long-term results.  With homesteading, it's difficult to know.  Our favorite verse is 1 Thessalonians 4:11, "Make it your ambition to lead a quiet life, mind your own business, and work with your hands." We do feel that a simpler, slower way of life is pleasing to the Lord...but we have stress and struggles that do not please Him.  We know our boys are having experiences that few children have and are learning so much...but they are missing out on other experiences like traveling and riding bikes through the neighborhood.  We know that some great things will come from our homestead in the long-term...but we also know that there will be some downsides as well.

The day after our eagerness to give it all up, we both received renewed clarity and focus.  So for now at least, we are pushing through and holding fast to the lifestyle we've chosen.  Do we love it? Yes.  Every day? No.  And we're pretty sure that at some time or another everybody else feels the same way about the life they've chosen...

Thursday, June 26, 2014

Canning Basics

It's that time of year when the garden is overflowing, and I'm left with a counter full of veggies and asking, "What am I supposed to do with all of this stuff?"  (Every year, I promise myself I won't plant this much again, but every year, I get caught up in the excitement of planting and go overboard.)

So now begins the season of preserving.  There are several options for preserving homegrown produce: freezing, canning, curing, keeping, etc.

Over the next few weeks, I am going to provide some super easy preserving recipes.  But before we get into that, here are some canning basics.

There are two types of canners: pressure and water bath.  There are some important differences between the two.

Pressure canner (left) and water bath canner (right)
Pressure Canner

  • A pressure canner is not the same thing as a pressure cooker.
  • Low acid foods MUST be preserved in a pressure canner.  This includes pretty much all vegetables unless they are going to be pickled, as well as animal products. (Yes, you can can chicken!)

Water Bath Canner

  • High acid foods may be preserved in a water bath canner.  This includes fruits, tomatoes, and pickled vegetables.
  • Water bath canners do not work great on smooth top ranges.  It may take as much as an hour for the water to boil.

With both canners, there must be a rack inside the canner to keep the jars off the bottom.

Whether using a pressure or water bath canner, having the right tools makes the process much easier.  I recommend Ball's Utensil Set for Preserving, which includes a funnel and can grabber (both essential), as well as a headspace tool and magnet.  This kit costs less than $10.


Ball brand Utensil Set for Preserving

Along with the canner, you will also need jars specifically made for canning, lids, and bands.  Jars come in quart, pint, and half-pint sizes.  Jars also come with regular and wide-mouth openings.  Be sure your lids and bands match the jar opening size.  Jars and bands may be reused, but lids can be used only one time.

Ball brand mason jar, lid, and band

Before canning, jars, lids, and bands must be sterilized.  You can do this by either washing them in hot, soapy water and then boiling them for about 10 minutes, or you can run them through the dishwasher.  I use the dishwasher method (remember, I'm lazy).

It's important to know that a quick temperature change can cause jars to crack.  So if you are adding hot contents to the jars (you usually are), then the jars need to be hot as well.  I get mine straight from the dishwasher while they're still hot and add the contents immediately.  If you're unable to do this or are canning a large amount, you can put the jars in the oven on 250 degrees to keep them warm until ready for use.

Always check your recipe for the length of time the jars should remain in the canner.  It depends on size, food type, and altitude.  The last multi-purpose item you will need is canning salt.

Ball brand canning salt

Supply List Recap
Canner (pressure or water bath)
Utensil set
Jars
Lids
Bands
Canning Salt

Now that you know the basics and have gathered your supplies, you're all set for my upcoming recipes!

Monday, June 23, 2014

Monday Meals: Baked Blackened Tilapia

This is one of the fastest, easiest (and healthiest) meals ever.  It's the perfect meal to make after a long, busy day.

Ingredients
4-6 Tilapia filets (fresh or frozen)
Old Bay with blackened seasoning
1 TBS Butter (organic, unsalted)

If you're using frozen tilapia, you will need to thaw it.  You can thaw it by placing it in the refrigerator the night before or in the morning, or by setting it out for a couple of hours, or by running it under room-temperature water for a few minutes.

Directions
  1. Melt butter and cover bottom of 9x13 baking dish.
  2. Coat each filet with Old Bay blackened seasoning based on your likeness.  (For the kids, I sprinkle just a pinch or two on each filet after it's in the dish.  For the adults, I use about 1 tsp per filet...it's spicy!)
  3. Place fish in baking dish.  Some may slightly overlap.
  4. Bake on 450 degrees for 15-20 minutes.  (Most baked fish recipes, recommend flipping the fish after 10 minutes, but it's not necessary.)
  5. Fish is done when it flakes when cut with a fork in the center.


For side items, we like quinoa for our grain and either broccoli or asparagus for our green veggie.  This is a family favorite around here, and it's super, super easy!

Monday, June 16, 2014

Monday Meals: Honey Chicken Stir Fry

Today's meal has endless variations, so you can make it twice a week and no one will really know.

Ingredients
Boneless, skinless chicken breast (breast, cutlets, or tenderloins)
Mixed vegetables (fresh or frozen; local, organic preferred)
3 TBS honey (local, organic preferred)
1 TBS extra virgin olive oil
1 TBS marinade (such as Moore's)

You will need two skillets (cast iron or ceramic) and two cooking utensils.

Directions
Cut chicken into cubes or strips.  Cut vegetables if necessary.  Today, I used fresh vegetables from the garden (squash, zucchini, and green beans), but I often use a frozen California blend.


In one skillet, cook chicken in marinade over medium-high heat.  Stir just enough to keep chicken from sticking.


In another skillet, cook vegetables in 1 TBS olive oil and 1 TBS honey over low-medium heat.  (If using a microwave steamable bag, cook as directed on package and add to chicken as soon as chicken is cooked.)


As chicken is almost finished, add 1 TBS of honey.  As vegetables are almost finished, add 1 TBS of honey.

Throw in a side dish, such as a fruit salad, and you're done!

Notes
Okay, so I know these directions are extremely vague, but that's because there is no set way of making stir fry.  The measurements are "guesstimations," and I have no idea how long it will take (maybe 10 minutes) because it depends on the thickness of chicken and vegetables.  I apologize to you OCD folks that need explicit instructions!  And to really mess you up, here are some of the variations to make this one meal into many meals.

1. Use chicken, beef, or shrimp.
2. Use ANY vegetables.  (Onions and peppers make a totally different meal than cauliflower and carrots!)
3. Use ANY spice or seasoning in place of honey.  Sometimes I just do sea salt and black pepper.
4. Use ANY marinade or skip it altogether.  Sometimes I use soy sauce and sometimes just olive oil.
5. Mix it all together or plate it separately.

There's no "right" or "wrong" with this meal.  And sometimes it changes right in the middle (Oops, my chicken is sticking...add a little Moore's sauce!)  Have fun with this one, and let me know if you try it.

Thursday, June 12, 2014

Natural Living: Start Small

Many people have asked me, especially recently, how they can make the big switch to the natural life.  I try to answer specific questions, but the conversation usually ends with me saying, "Yes, you can do this.  Just start small!"

I would LOVE to be able to say that I only eat organic food that I've grown or raised myself, that I own nothing made outside of the US, that I produce my own electricity, that I have zero chemicals in my home, and so on and so on.  But I'm not there yet (and probably won't ever be).  What I am doing is educating myself and always trying to "do a little better."

Here's how my family has progressively changed our lifestyle over the last 8 years:

1. Ate a little healthier (in stages).

  • Bought fruit instead of processed snacks.
  • Cooked supper at home more often.
  • Stopped eating fast food.
  • Stayed on the outer aisles of the grocery store.
  • Eliminated foods with chemicals (such as dyes, flavorings, and preservatives).
  • Reduced (would like to eliminate) processed food.


To help make healthier choices, ask yourself: Is it nutritional and is it natural?

Eat nutritional, natural food.

2. Switched to organic and fair trade foods (first produce and milk, and then expanded from there).


Look for the USDA Organic symbol.


3. Eliminated Teflon-coated cookware.  We use ceramic and cast iron skillets.

4. Started growing our own produce.  We started with easy perennials, like strawberries and asparagus, in small raised beds and expanded from there.

5. Constructed a rain barrel.

6. Reduced waste. We started reusing things like Ziploc bags and food containers.  We started recycling and composting.

Reduce. Reuse. Recycle.


7. Switched to natural and organic products.

  • Tom's toothpaste, bar soap, and deodorant.
  • Mrs. Meyer's liquid handsoap.
  • Dr. Bronner's castille soap for cleaning.
  • Seventh Generation laundry and dishwashing detergent.
  • Burt's Bees and Nature's Gate shampoo.
Tom's is a popular brand.

8. Began buying American-made products.  (This has been the most difficult.)

9. Began raising our own meat.  We are in the very early stages of this.


There are plenty of people out there that are completely self-sustaining.  I am pretty sure I won't ever get to that point just because I'm too lazy.  I don't see myself grinding my own flour or making my own soap, but who knows...

So, my final advice is this: If you are interested in living a more natural life, pick what's important to you and focus on that one thing first.  Don't get overwhelmed in trying to make a drastic overhaul at once.  Start small!

Monday, June 9, 2014

Monday Meals: Asian Shrimp with Broccoli and Quinoa

I have long disliked cooking.  I don't like being in the kitchen, I don't like the mess it makes,  I never know what I'm doing, I'm scared of getting burned, and I'm perfectly happy eating a sandwich or a bowl of cereal for supper.  Those are just a few of the reasons I don't like cooking.

But to ensure my family is eating healthy, I have to cook for them.  And for me to cook, it has to be quick and simple.  (Pretty much like everything else I do.)  So I am introducing Monday Meals.  Every Monday, I will post a quick, simple, (mostly) clean meal for you to try.  And please do try it, because if I cook something, then literally anybody can cook it.

This Asian Shrimp meal has 7 ingredients (including the entree and sides), and it takes about 25 minutes to prepare and cook.  It doesn't get much easier than that!!!

ASIAN SHRIMP WITH BROCCOLI AND QUINOA

Ingredients
1.5 pounds PEELED shrimp (fresh or frozen)
2 TBS organic extra virgin olive oil
1 TBS local, organic honey
1 TBS organic, low-sodium soy sauce
2 TBS McCormick 'Perfect Pinch' Asian seasoning
Organic broccoli (fresh or frozen)
Organic, fair-trade quinoa or brown rice

*If you can't find local, organic, fair-trade, low-sodium, etc. for each ingredient, then use what you can.

Directions
First, cook quinoa (pronounced KEEN-wah) or brown rice according to directions.  I use the Near East brand of a quinoa/brown rice blend.  It takes about 20 minutes to cook.


Steam fresh broccoli on the stove, or use a microwave steamable product.  If I don't have any in the garden, I use the Publix Greenwise brand in the microwave steamer bag.  It takes about 6 minutes to cook.


While the quinoa and broccoli are cooking, cook the Asian Shrimp as follows:

*IMPORTANT NOTE: I use PEELED, DEVEINED, TAIL-OFF medium shrimp.  The shrimp must be peeled before you cook them!

Place shrimp in a large ceramic or cast iron skillet.  (If shrimp is frozen, cook on high heat until thawed.  Drain water from shrimp.  Return to skillet and continue following recipe.)


Drizzle with olive oil.  Add ingredients and stir.  (The amounts are estimates and not true measurements.)


Cook shrimp on medium-high heat for about 5 minutes.  It may take more or less time depending on the size and temperature of the shrimp.  When all the shrimp have turned pink, it is done.


Fix your plates (you can lay the shrimp on top of the rice or keep everything separate) and enjoy!  I wish I had a picture of everything nicely plated, but I was too ready to eat to take pictures!

Friday, June 6, 2014

Responsible Popcorn

Friday night means one thing in our house: MOVIE NIGHT!  Our movie nights are always the same...the sleeper sofa is pulled out, popcorn is made, and Sprites are poured.  It's a tradition we started years ago, and now, the boys won't let us miss it!  We ALL look forward to relaxing after a busy week of activities.


Popcorn and Sprites are in no way healthy, but everybody deserves a treat!  And even a treat like popcorn can be made naturally.  Here's how we do it:

First, we use an air popper.  An air popper is not only healthier, but it also adds a lot of excitement to the popping process.  The boys go crazy watching the popcorn puffs shoot out of the machine!

We love our Presto Poplite air popper!

Also, we choose natural, unflavored kernels.  (If you can find organic, great!)

Organic kernels are a wise choice.

If plain ol' popcorn is too boring for you, there are many natural ways to flavor it.  The boys' favorite topping is melted organic butter and a touch of sea salt.  My favorite topping is a tiny bit of extra virgin olive oil and ground peppercorns.  If you like a sweet kettle corn, try a little coconut oil, a touch of sea salt, and a little sugar (all organic of course).


So I debated on whether or not to go into why microwave popcorn is so bad for you since all I could really do is copy information from other websites.  But I didn't feel right about NOT spreading the information either, so here's the quick list of reasons to NEVER make it again:

1. The bags are lined with perfluorooctanoic acid
2. It contains chemical flavorings (such as Diacetyl)
3. It contains chemical preservatives (such as TBHQ)
4. It has more calories and trans fat

Furthermore, naturally cooked popcorn is more eco-friendly.  You can make just the amount you need, and there's no bag to throw away.  

Now, go enjoy some natural popcorn and don't forget to post your favorite popcorn topping recipes in the comments section.