This is entirely different from any post I have written before, but I need to get real with you all...I have some confessions...
Several weeks ago, my dear friend Janice brought some of her friends out to our homestead. I immediately fell in love with Rebecca...kindred spirits for sure! At one point, Rebecca commented, "Y'all are living the dream!" What I wanted to say back (and maybe I did) was, "The dream is so much better than the reality." Homesteading is hard work...plain and simple! Do I love it? Yes. Every day? No.
So that's my first confession...some days, I do not enjoy this lifestyle choice one single bit! Here's the reality of it and a few more confessions...
Time
Every morning and every night, animals must be fed and watered. There are routine tasks like worming and hoof trimming. The barn, chicken coop, and pens constantly have to be cleaned. There is always (and I mean ALWAYS) something to be fixed or worked on. Our farm work truly never ends.
Last week, I had to leave a really fun pool party with dear friends right in the middle of laughter and good conversation. It was hot, and I started worrying about the animals running out of water. I hated to leave, but I had no choice.
Today, instead of taking the boys to the community pool, I mowed grass for 3 hours (with plenty left undone). Then, I cleaned out the goat barn. It was hot, sweaty, and exhausting. Tomorrow, I will still have to clean out the chicken coop and pig pen...but only after a trip to the feed store.
Money
Speaking of the feed store, most people probably don't realize the cost involved in growing and preserving food and raising animals. I am constantly going to the feed or home improvement store to get feed, fencing, gates, tools, supplies, etc. Not to mention the big costs like farm equipment and livestock.
Think about the price of a pound of beef. In May, we bought about 5,000 pounds worth of cattle! That's a lot more than pocket change for us! It seems like every spare penny (and there aren't many to begin with) go into the farm.
Brandon and I had many conversations about the financial sacrifices we would have to make to start our farm. In the middle of winter, giving up our annual summer beach trip and a trip to Disney World seemed easy enough. But now that summer is here and our friends are traveling, it's been tougher to give up those vacations than we thought.
Emotions
Making financial sacrifices is just one part of the emotional toll homesteading takes on me. We have seen our share of loss, from animals to produce. The animals have injuries, and we wait anxiously to see if they will heal. We work hard at something, only to have it undone by a storm or a drought. There are more questions and concerns than I could ever list here.
A few evenings ago, we were drained...physically, financially, and emotionally...and for the first time, we deeply considered selling the whole thing (lock, stock, and barrel as they say) and moving to a postage stamp lot in a neighborhood with a swimming pool!
We always try to make decisions based on three things: 1) pleasing the Lord, 2) the welfare of our boys, and 3) long-term results. With homesteading, it's difficult to know. Our favorite verse is 1 Thessalonians 4:11, "Make it your ambition to lead a quiet life, mind your own business, and work with your hands." We do feel that a simpler, slower way of life is pleasing to the Lord...but we have stress and struggles that do not please Him. We know our boys are having experiences that few children have and are learning so much...but they are missing out on other experiences like traveling and riding bikes through the neighborhood. We know that some great things will come from our homestead in the long-term...but we also know that there will be some downsides as well.
The day after our eagerness to give it all up, we both received renewed clarity and focus. So for now at least, we are pushing through and holding fast to the lifestyle we've chosen. Do we love it? Yes. Every day? No. And we're pretty sure that at some time or another everybody else feels the same way about the life they've chosen...
Friday, June 27, 2014
Thursday, June 26, 2014
Canning Basics

So now begins the season of preserving. There are several options for preserving homegrown produce: freezing, canning, curing, keeping, etc.
Over the next few weeks, I am going to provide some super easy preserving recipes. But before we get into that, here are some canning basics.
There are two types of canners: pressure and water bath. There are some important differences between the two.
 |
| Pressure canner (left) and water bath canner (right) |
- A pressure canner is not the same thing as a pressure cooker.
- Low acid foods MUST be preserved in a pressure canner. This includes pretty much all vegetables unless they are going to be pickled, as well as animal products. (Yes, you can can chicken!)
Water Bath Canner
- High acid foods may be preserved in a water bath canner. This includes fruits, tomatoes, and pickled vegetables.
- Water bath canners do not work great on smooth top ranges. It may take as much as an hour for the water to boil.
With both canners, there must be a rack inside the canner to keep the jars off the bottom.
Whether using a pressure or water bath canner, having the right tools makes the process much easier. I recommend Ball's Utensil Set for Preserving, which includes a funnel and can grabber (both essential), as well as a headspace tool and magnet. This kit costs less than $10.
 |
| Ball brand Utensil Set for Preserving |
Along with the canner, you will also need jars specifically made for canning, lids, and bands. Jars come in quart, pint, and half-pint sizes. Jars also come with regular and wide-mouth openings. Be sure your lids and bands match the jar opening size. Jars and bands may be reused, but lids can be used only one time.
 |
| Ball brand mason jar, lid, and band |
Before canning, jars, lids, and bands must be sterilized. You can do this by either washing them in hot, soapy water and then boiling them for about 10 minutes, or you can run them through the dishwasher. I use the dishwasher method (remember, I'm lazy).
It's important to know that a quick temperature change can cause jars to crack. So if you are adding hot contents to the jars (you usually are), then the jars need to be hot as well. I get mine straight from the dishwasher while they're still hot and add the contents immediately. If you're unable to do this or are canning a large amount, you can put the jars in the oven on 250 degrees to keep them warm until ready for use.
Always check your recipe for the length of time the jars should remain in the canner. It depends on size, food type, and altitude. The last multi-purpose item you will need is canning salt.
 |
| Ball brand canning salt |
Supply List Recap
Canner (pressure or water bath)
Utensil set
Jars
Lids
Bands
Canning Salt
Now that you know the basics and have gathered your supplies, you're all set for my upcoming recipes!
Monday, June 23, 2014
Monday Meals: Baked Blackened Tilapia
Ingredients
4-6 Tilapia filets (fresh or frozen)
Old Bay with blackened seasoning
1 TBS Butter (organic, unsalted)
If you're using frozen tilapia, you will need to thaw it. You can thaw it by placing it in the refrigerator the night before or in the morning, or by setting it out for a couple of hours, or by running it under room-temperature water for a few minutes.
Directions

- Melt butter and cover bottom of 9x13 baking dish.
- Coat each filet with Old Bay blackened seasoning based on your likeness. (For the kids, I sprinkle just a pinch or two on each filet after it's in the dish. For the adults, I use about 1 tsp per filet...it's spicy!)
- Place fish in baking dish. Some may slightly overlap.
- Bake on 450 degrees for 15-20 minutes. (Most baked fish recipes, recommend flipping the fish after 10 minutes, but it's not necessary.)
- Fish is done when it flakes when cut with a fork in the center.
For side items, we like quinoa for our grain and either broccoli or asparagus for our green veggie. This is a family favorite around here, and it's super, super easy!
Monday, June 16, 2014
Monday Meals: Honey Chicken Stir Fry

Ingredients
Boneless, skinless chicken breast (breast, cutlets, or tenderloins)
Mixed vegetables (fresh or frozen; local, organic preferred)
3 TBS honey (local, organic preferred)
1 TBS extra virgin olive oil
1 TBS marinade (such as Moore's)
You will need two skillets (cast iron or ceramic) and two cooking utensils.
Directions
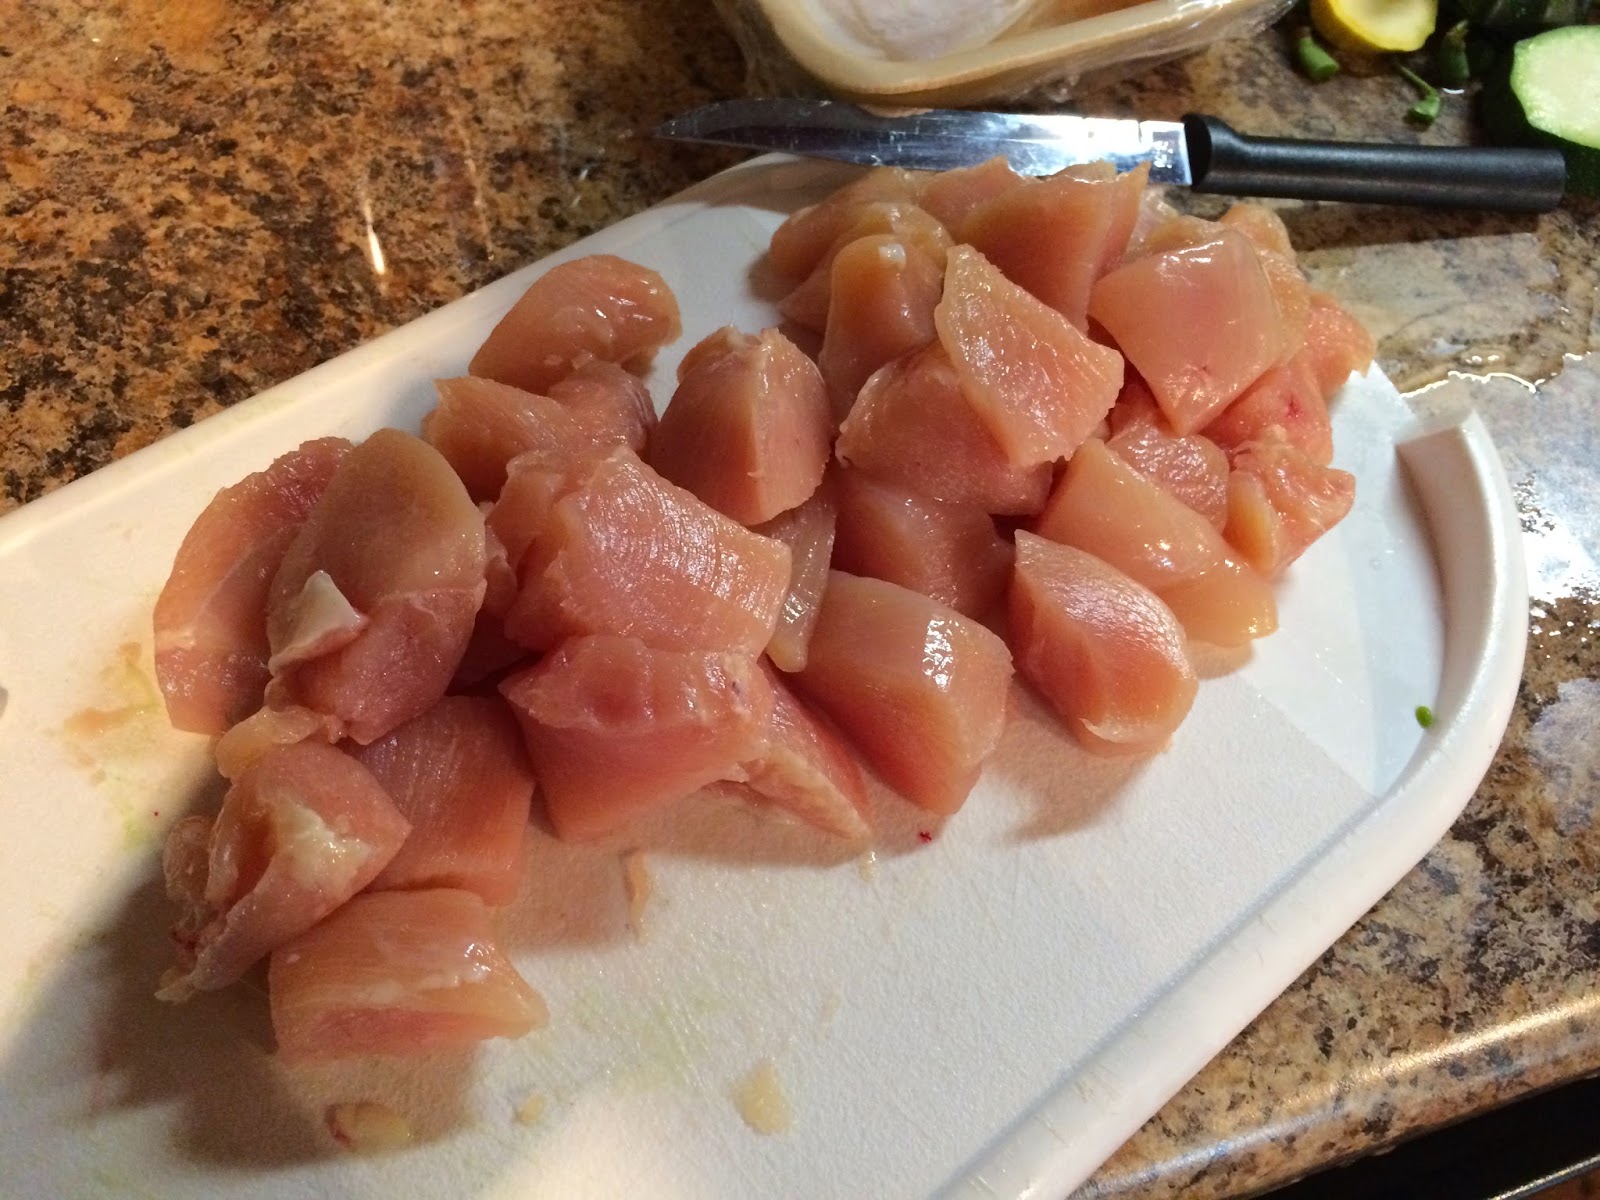
Cut chicken into cubes or strips. Cut vegetables if necessary. Today, I used fresh vegetables from the garden (squash, zucchini, and green beans), but I often use a frozen California blend.

In one skillet, cook chicken in marinade over medium-high heat. Stir just enough to keep chicken from sticking.


As chicken is almost finished, add 1 TBS of honey. As vegetables are almost finished, add 1 TBS of honey.
Throw in a side dish, such as a fruit salad, and you're done!
Notes
Okay, so I know these directions are extremely vague, but that's because there is no set way of making stir fry. The measurements are "guesstimations," and I have no idea how long it will take (maybe 10 minutes) because it depends on the thickness of chicken and vegetables. I apologize to you OCD folks that need explicit instructions! And to really mess you up, here are some of the variations to make this one meal into many meals.
1. Use chicken, beef, or shrimp.
2. Use ANY vegetables. (Onions and peppers make a totally different meal than cauliflower and carrots!)
3. Use ANY spice or seasoning in place of honey. Sometimes I just do sea salt and black pepper.
4. Use ANY marinade or skip it altogether. Sometimes I use soy sauce and sometimes just olive oil.
5. Mix it all together or plate it separately.
There's no "right" or "wrong" with this meal. And sometimes it changes right in the middle (Oops, my chicken is sticking...add a little Moore's sauce!) Have fun with this one, and let me know if you try it.
Thursday, June 12, 2014
Natural Living: Start Small
Many people have asked me, especially recently, how they can make the big switch to the natural life. I try to answer specific questions, but the conversation usually ends with me saying, "Yes, you can do this. Just start small!"
I would LOVE to be able to say that I only eat organic food that I've grown or raised myself, that I own nothing made outside of the US, that I produce my own electricity, that I have zero chemicals in my home, and so on and so on. But I'm not there yet (and probably won't ever be). What I am doing is educating myself and always trying to "do a little better."
Here's how my family has progressively changed our lifestyle over the last 8 years:
1. Ate a little healthier (in stages).
3. Eliminated Teflon-coated cookware. We use ceramic and cast iron skillets.
4. Started growing our own produce. We started with easy perennials, like strawberries and asparagus, in small raised beds and expanded from there.
5. Constructed a rain barrel.
6. Reduced waste. We started reusing things like Ziploc bags and food containers. We started recycling and composting.
7. Switched to natural and organic products.
There are plenty of people out there that are completely self-sustaining. I am pretty sure I won't ever get to that point just because I'm too lazy. I don't see myself grinding my own flour or making my own soap, but who knows...
So, my final advice is this: If you are interested in living a more natural life, pick what's important to you and focus on that one thing first. Don't get overwhelmed in trying to make a drastic overhaul at once. Start small!
I would LOVE to be able to say that I only eat organic food that I've grown or raised myself, that I own nothing made outside of the US, that I produce my own electricity, that I have zero chemicals in my home, and so on and so on. But I'm not there yet (and probably won't ever be). What I am doing is educating myself and always trying to "do a little better."
Here's how my family has progressively changed our lifestyle over the last 8 years:
1. Ate a little healthier (in stages).
- Bought fruit instead of processed snacks.
- Cooked supper at home more often.
- Stopped eating fast food.
- Stayed on the outer aisles of the grocery store.
- Eliminated foods with chemicals (such as dyes, flavorings, and preservatives).
- Reduced (would like to eliminate) processed food.
To help make healthier choices, ask yourself: Is it nutritional and is it natural?
 |
| Eat nutritional, natural food. |
2. Switched to organic and fair trade foods (first produce and milk, and then expanded from there).
 |
| Look for the USDA Organic symbol. |
3. Eliminated Teflon-coated cookware. We use ceramic and cast iron skillets.
4. Started growing our own produce. We started with easy perennials, like strawberries and asparagus, in small raised beds and expanded from there.
5. Constructed a rain barrel.
6. Reduced waste. We started reusing things like Ziploc bags and food containers. We started recycling and composting.
| Reduce. Reuse. Recycle. |
7. Switched to natural and organic products.
- Tom's toothpaste, bar soap, and deodorant.
- Mrs. Meyer's liquid handsoap.
- Dr. Bronner's castille soap for cleaning.
- Seventh Generation laundry and dishwashing detergent.
- Burt's Bees and Nature's Gate shampoo.
 |
| Tom's is a popular brand. |
8. Began buying American-made products. (This has been the most difficult.)
9. Began raising our own meat. We are in the very early stages of this.
There are plenty of people out there that are completely self-sustaining. I am pretty sure I won't ever get to that point just because I'm too lazy. I don't see myself grinding my own flour or making my own soap, but who knows...
So, my final advice is this: If you are interested in living a more natural life, pick what's important to you and focus on that one thing first. Don't get overwhelmed in trying to make a drastic overhaul at once. Start small!
Monday, June 9, 2014
Monday Meals: Asian Shrimp with Broccoli and Quinoa
I have long disliked cooking. I don't like being in the kitchen, I don't like the mess it makes, I never know what I'm doing, I'm scared of getting burned, and I'm perfectly happy eating a sandwich or a bowl of cereal for supper. Those are just a few of the reasons I don't like cooking.
But to ensure my family is eating healthy, I have to cook for them. And for me to cook, it has to be quick and simple. (Pretty much like everything else I do.) So I am introducing Monday Meals. Every Monday, I will post a quick, simple, (mostly) clean meal for you to try. And please do try it, because if I cook something, then literally anybody can cook it.
This Asian Shrimp meal has 7 ingredients (including the entree and sides), and it takes about 25 minutes to prepare and cook. It doesn't get much easier than that!!!
1.5 pounds PEELED shrimp (fresh or frozen)
2 TBS organic extra virgin olive oil
1 TBS local, organic honey
1 TBS organic, low-sodium soy sauce
2 TBS McCormick 'Perfect Pinch' Asian seasoning
Organic broccoli (fresh or frozen)
Organic, fair-trade quinoa or brown rice
*If you can't find local, organic, fair-trade, low-sodium, etc. for each ingredient, then use what you can.
Directions
First, cook quinoa (pronounced KEEN-wah) or brown rice according to directions. I use the Near East brand of a quinoa/brown rice blend. It takes about 20 minutes to cook.

Steam fresh broccoli on the stove, or use a microwave steamable product. If I don't have any in the garden, I use the Publix Greenwise brand in the microwave steamer bag. It takes about 6 minutes to cook.

While the quinoa and broccoli are cooking, cook the Asian Shrimp as follows:
*IMPORTANT NOTE: I use PEELED, DEVEINED, TAIL-OFF medium shrimp. The shrimp must be peeled before you cook them!
Place shrimp in a large ceramic or cast iron skillet. (If shrimp is frozen, cook on high heat until thawed. Drain water from shrimp. Return to skillet and continue following recipe.)

Drizzle with olive oil. Add ingredients and stir. (The amounts are estimates and not true measurements.)

Cook shrimp on medium-high heat for about 5 minutes. It may take more or less time depending on the size and temperature of the shrimp. When all the shrimp have turned pink, it is done.

Fix your plates (you can lay the shrimp on top of the rice or keep everything separate) and enjoy! I wish I had a picture of everything nicely plated, but I was too ready to eat to take pictures!
But to ensure my family is eating healthy, I have to cook for them. And for me to cook, it has to be quick and simple. (Pretty much like everything else I do.) So I am introducing Monday Meals. Every Monday, I will post a quick, simple, (mostly) clean meal for you to try. And please do try it, because if I cook something, then literally anybody can cook it.
This Asian Shrimp meal has 7 ingredients (including the entree and sides), and it takes about 25 minutes to prepare and cook. It doesn't get much easier than that!!!
ASIAN SHRIMP WITH BROCCOLI AND QUINOA
Ingredients1.5 pounds PEELED shrimp (fresh or frozen)
2 TBS organic extra virgin olive oil
1 TBS local, organic honey
1 TBS organic, low-sodium soy sauce
2 TBS McCormick 'Perfect Pinch' Asian seasoning
Organic broccoli (fresh or frozen)
Organic, fair-trade quinoa or brown rice
*If you can't find local, organic, fair-trade, low-sodium, etc. for each ingredient, then use what you can.
Directions
First, cook quinoa (pronounced KEEN-wah) or brown rice according to directions. I use the Near East brand of a quinoa/brown rice blend. It takes about 20 minutes to cook.
Steam fresh broccoli on the stove, or use a microwave steamable product. If I don't have any in the garden, I use the Publix Greenwise brand in the microwave steamer bag. It takes about 6 minutes to cook.
While the quinoa and broccoli are cooking, cook the Asian Shrimp as follows:
*IMPORTANT NOTE: I use PEELED, DEVEINED, TAIL-OFF medium shrimp. The shrimp must be peeled before you cook them!
Place shrimp in a large ceramic or cast iron skillet. (If shrimp is frozen, cook on high heat until thawed. Drain water from shrimp. Return to skillet and continue following recipe.)
Drizzle with olive oil. Add ingredients and stir. (The amounts are estimates and not true measurements.)
Cook shrimp on medium-high heat for about 5 minutes. It may take more or less time depending on the size and temperature of the shrimp. When all the shrimp have turned pink, it is done.
Fix your plates (you can lay the shrimp on top of the rice or keep everything separate) and enjoy! I wish I had a picture of everything nicely plated, but I was too ready to eat to take pictures!
Friday, June 6, 2014
Responsible Popcorn

Popcorn and Sprites are in no way healthy, but everybody deserves a treat! And even a treat like popcorn can be made naturally. Here's how we do it:
First, we use an air popper. An air popper is not only healthier, but it also adds a lot of excitement to the popping process. The boys go crazy watching the popcorn puffs shoot out of the machine!
 |
| We love our Presto Poplite air popper! |
Also, we choose natural, unflavored kernels. (If you can find organic, great!)
 |
| Organic kernels are a wise choice. |
If plain ol' popcorn is too boring for you, there are many natural ways to flavor it. The boys' favorite topping is melted organic butter and a touch of sea salt. My favorite topping is a tiny bit of extra virgin olive oil and ground peppercorns. If you like a sweet kettle corn, try a little coconut oil, a touch of sea salt, and a little sugar (all organic of course).
 So I debated on whether or not to go into why microwave popcorn is so bad for you since all I could really do is copy information from other websites. But I didn't feel right about NOT spreading the information either, so here's the quick list of reasons to NEVER make it again:
1. The bags are lined with perfluorooctanoic acid
2. It contains chemical flavorings (such as Diacetyl)
3. It contains chemical preservatives (such as TBHQ)
4. It has more calories and trans fat
Furthermore, naturally cooked popcorn is more eco-friendly. You can make just the amount you need, and there's no bag to throw away.
Now, go enjoy some natural popcorn and don't forget to post your favorite popcorn topping recipes in the comments section.
Thursday, June 5, 2014
Weekend Project: Clothesline
Following are plans for building and installing a clothesline yourself.
Materials List:
four 8' long 4x4 posts
screws
four bags of concrete mix
four heavy duty hooks
four clothesline pulleys
100' clothesline
You will also need a tape measure, saw, drill, and something to mix your concrete with.
Trust me, if you take the time and spend the money to build and install your clothesline correctly, you'll be much happier with the finished product, and it will last a long time. Keep in mind that a load of sopping wet clothes is actually pretty heavy, so the clothesline needs to be strong and secure.
Construct your two end pieces based on the dimensions below. Both the horizontal and vertical pieces are notched out at the intersection. Don't forget to insert the heavy duty hooks.


(Sorry I don't know the angles of the support pieces. We just laid the posts on top of the 4x4 and drew lines with a pencil.)
Though it may not be the most attractive location, the clothesline needs to be in an open area, away from trees. Place the end pieces about 24' apart (this allows for a 50' length of clothesline on each side). Dig each hole to be 18" deep with a 20" diameter. This may seem large, but trust me, you want the end pieces to stay straight and secure.

Place the end pieces into the holes with the hooks facing each other. Fill the holes to the very top with concrete mix (after following the manufacturer's directions) and let dry.
Once the concrete has set, hang the clothesline pulleys and and the lines. Pull the lines as tight as you can possibly get them. Over time, the lines will loosen and sag, and you will have to re-tighten them periodically.

Now that you have a clothesline, here are just a few tips:
1. Use it! It really is so much easier to toss a wet load in the electric dryer, but make yourself use the clothesline, and you'll always be glad you did.
2. Use heavy-duty clothespins. There really is a difference in the cheap ones.
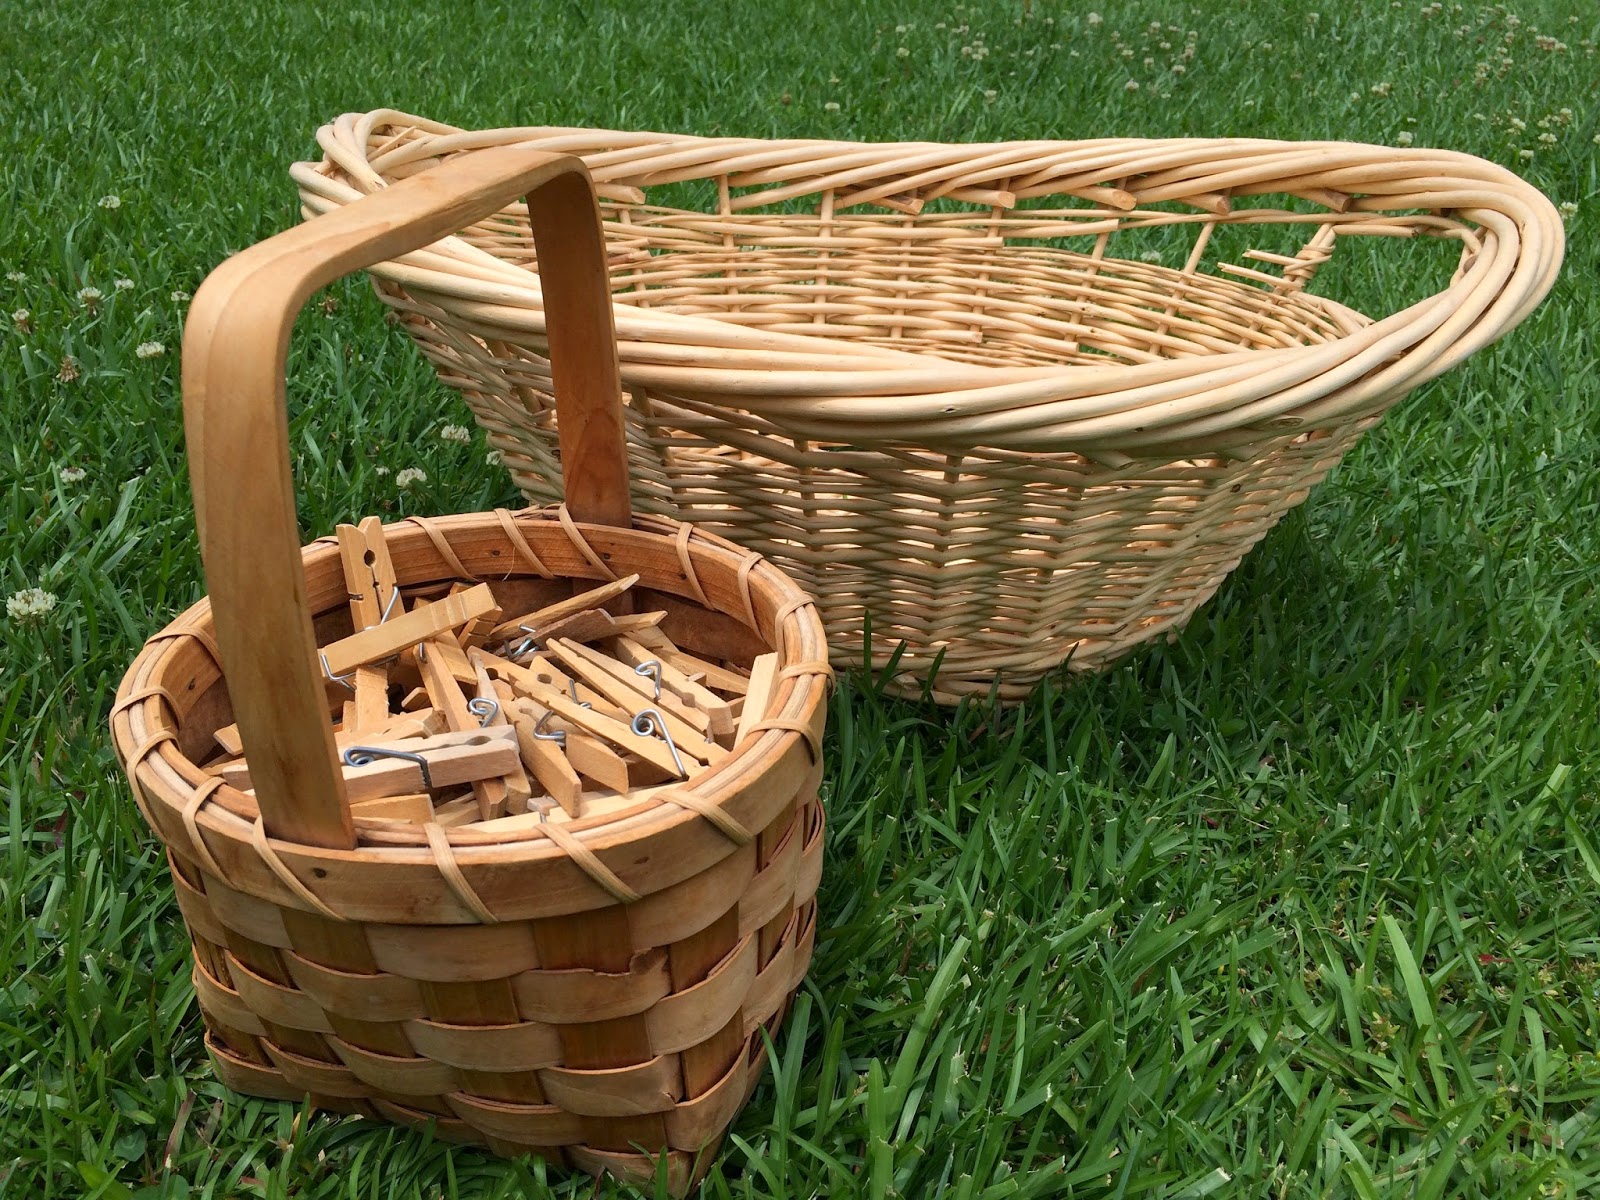
3. Keep your clothespins in a basket or tote that is easy to carry to and from the clothesline.
4. When hanging clothes, I usually stand in between my two lines and hang the adults' clothes on one line and the children's clothes on the other.
5. I also usually fold the clothes as I take them off the line. By doing #4 and #5, once I have the clothes off the line, they are already folded and sorted and can go straight into drawers.
 |
| Heavy Duty Clothespins |
Tuesday, June 3, 2014
Coffee Drinkers Unite
I have a confession: I am a coffee drinker. I do my best to eat/drink healthy, but I currently have a coffee habit...one cup almost every morning. I reassure myself with a study from a few years ago that said one cup of coffee per day may reduce my risk of melanoma. Yeah, sure, that's what I'm telling myself.


So if you are like me and just don't want to shake the caffeine, I have some eco-friendly tips to assuage the guilt of coffee. Here goes...
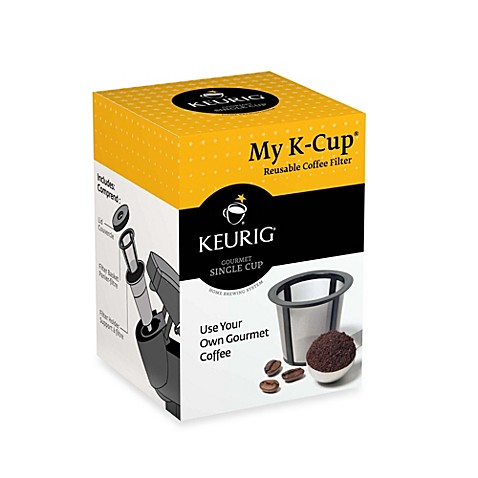
1. Reusable Filter. If you use k-cups, STOP! Not only are those little plastic cups harmful, but they are also wasteful. I love the convenience of the Keurig as much as the next person, and you can still use the machine, just swap the cups for the reusable filter. You can purchase one anywhere Keurig machines and accessories are sold. If you can find (and afford) a non-plastic one that fits your machine, that's even better. Here's the one I use.
Yes, you lose some of the convenience because the filter has to be cleaned out, but it's safer, produces less waste, saves money, and the grounds can be composted. I think all those benefits are definitely worth one extra minute of your time!
2. Organic. Yes, you can buy organic coffee. As with all your foods, look for the USDA certified organic seal.
3. Fair Trade. Most of us are now familiar with the organic seal above, but fewer people think about purchasing fair trade certified products. There are actually several different seals, but these two are the most widely accepted.
Why is fair trade important? Fair trade ensures that workers, especially those in third-world countries, are paid fair wages, and Fair Trade USA promotes sustainable practices as well. You can find out more at fairtradeusa.org.
The coffee I am drinking as I type this is The Organic Coffee Co.'s French Roast. It costs around $8 at Publix (much cheaper than k-cups...rough math is .25 versus .55 per cup).
The Organic Coffee Co. is a division of the Rogers Family Company. They have an amazing array of tea and coffee products, including kosher coffee. They have a beautiful website with lots of information, so if you are a coffee connoisseur, you would definitely enjoy checking it out www.rogersfamilyco.com.
4. Smart Sweeteners. I drink it black, but if you don't want to, at least be smart with your sweeteners and flavorings. Use local honey, organic milk, sugar that is also organic and fair trade certified, and organic, natural flavors. As always, ditch the fake stuff!
Monday, June 2, 2014
Organic Gardening Products I Love
I'm not going to sugar coat it...organic gardening is tough! I look at the neighbor's garden and see deep green plants that are twice the size of mine bearing fruit in half the time, and I groan inside. Sometimes I get so discouraged that I want to jump in my car, head to the garden center, and purchase every chemical they sell. But I stick to my guns and sweat it out (literally).
Along the way, however, I have found a few organic products that are helpful, so I want to share them with you. Please comment below to add your favorites to this list as well.
1. You can't beat chicken litter for a natural fertilizer, but if you don't have ready access, try Miracle-Gro's Organic Choice Organic Plant Food. Be prepared for a little odor, and if you have a dog, he/she will try to gobble it up about as fast as you can sprinkle it on. But I have seen my plants "take off" after using this product.

2. For insect control in small areas, try using an insecticidal soap. You can easily make your own by mixing 1 tablespoon of pure liquid soap such as Dr. Bronner's (found at Target and Publix), 1/2 tablespoon of cooking oil (vegetable, canola, olive, sunflower, etc.), and 1 quart of water. Mix it in a spray bottle and apply generously to plants.

3. For a large garden or persistent pests, try neem oil. It can be purchased already diluted in a spray bottle or in concentrate form, which you will mix with water in a sprayer. I have had luck with this Garden Safe brand.

Unfortunately, when it comes to insect control, nothing is going to kill 'em dead like the hardcore chemicals. But that fact alone should be enough to make you think twice about ingesting that stuff yourself. Putting in a little extra time and effort to remain organic is totally worth it in the end. Use whatever organic products you can find, and happily accept that nature is probably going to get a portion of your bounty!
Along the way, however, I have found a few organic products that are helpful, so I want to share them with you. Please comment below to add your favorites to this list as well.
1. You can't beat chicken litter for a natural fertilizer, but if you don't have ready access, try Miracle-Gro's Organic Choice Organic Plant Food. Be prepared for a little odor, and if you have a dog, he/she will try to gobble it up about as fast as you can sprinkle it on. But I have seen my plants "take off" after using this product.
2. For insect control in small areas, try using an insecticidal soap. You can easily make your own by mixing 1 tablespoon of pure liquid soap such as Dr. Bronner's (found at Target and Publix), 1/2 tablespoon of cooking oil (vegetable, canola, olive, sunflower, etc.), and 1 quart of water. Mix it in a spray bottle and apply generously to plants.
3. For a large garden or persistent pests, try neem oil. It can be purchased already diluted in a spray bottle or in concentrate form, which you will mix with water in a sprayer. I have had luck with this Garden Safe brand.
Unfortunately, when it comes to insect control, nothing is going to kill 'em dead like the hardcore chemicals. But that fact alone should be enough to make you think twice about ingesting that stuff yourself. Putting in a little extra time and effort to remain organic is totally worth it in the end. Use whatever organic products you can find, and happily accept that nature is probably going to get a portion of your bounty!
Sunday, June 1, 2014
Cloth Napkins: Ditch the Disposables
Growing up, I always remember using cloth napkins for holiday and special-occasion meals. As we got older, my mom began using cloth napkins for every meal.
A couple of years ago, after a meal at her house, I was thinking about how I loved using cloth napkins whenever we ate there, and it dawned on me...I can use cloth napkins at my house, too. My mom has a bit of an obsession with table linens, so she gave me several of her sets of napkins. We have been using them ever since.
One of the greatest things about using cloth napkins is that they are environmentally friendly. Just think for a moment how many napkins and paper towels an average family of four will go through in one day...one week...one year! It's mind-boggling! Making the switch to cloth napkins can make a big impact on the amount of household waste a person has, so please, give it a try.
If you have access to a sewing machine, making napkins is probably the simplest sewing project there is. Simply cut a square of fabric and hem the edges. Standard dinner napkins are 20x20 inches, which is a little large for every day use. My favorite set of napkins are these small, lightweight ones that are only 12x12 inches.

This set is also a favorite because the red and white gingham hides ketchup and pasta sauce stains quite nicely.

I think this set is the prettiest, but it is the most seldom used (for obvious reasons if you have ever seen my children eat!). However, we do pull out the classic white napkins for special occasions, and I love seeing them on my farmhouse table.

Cloth napkins are fun as well. Think of them as an accessory for your table. You can buy or make them in all kinds of colors and patterns. (My next sewing project is a set of Star Wars napkins per the kids' request.)
Cloth napkins add a "homey" touch to every meal, as well. Something about cloth napkins just seems more inviting. It tells guests that you're glad they're sharing a meal at your house and they're worth more than a disposable paper napkin.
I invite you all to make the eco-friendly switch to cloth and ditch the disposables!
A couple of years ago, after a meal at her house, I was thinking about how I loved using cloth napkins whenever we ate there, and it dawned on me...I can use cloth napkins at my house, too. My mom has a bit of an obsession with table linens, so she gave me several of her sets of napkins. We have been using them ever since.
One of the greatest things about using cloth napkins is that they are environmentally friendly. Just think for a moment how many napkins and paper towels an average family of four will go through in one day...one week...one year! It's mind-boggling! Making the switch to cloth napkins can make a big impact on the amount of household waste a person has, so please, give it a try.
If you have access to a sewing machine, making napkins is probably the simplest sewing project there is. Simply cut a square of fabric and hem the edges. Standard dinner napkins are 20x20 inches, which is a little large for every day use. My favorite set of napkins are these small, lightweight ones that are only 12x12 inches.
This set is also a favorite because the red and white gingham hides ketchup and pasta sauce stains quite nicely.
I think this set is the prettiest, but it is the most seldom used (for obvious reasons if you have ever seen my children eat!). However, we do pull out the classic white napkins for special occasions, and I love seeing them on my farmhouse table.
Cloth napkins are fun as well. Think of them as an accessory for your table. You can buy or make them in all kinds of colors and patterns. (My next sewing project is a set of Star Wars napkins per the kids' request.)
Cloth napkins add a "homey" touch to every meal, as well. Something about cloth napkins just seems more inviting. It tells guests that you're glad they're sharing a meal at your house and they're worth more than a disposable paper napkin.
I invite you all to make the eco-friendly switch to cloth and ditch the disposables!
Subscribe to:
Comments (Atom)